15 November 2011

Squishing things into small boxes, Part 1

I really don't know why I keep signing up for pairs of swaps that are "due" within a week of each other. They're so tempting! I guess I like the deadline-imposed creativity.  But I think I am not so good with actually meeting the deadlines. Swap mamas, hide your eyes... of the four I've participated in: one was on time, two were a day late (but I sent Priority instead of First Class), and the last one, I feel bad sending it practically a week late, but I would rather late than half-assed. Cuz half-assed is just a waste of time and resources. Mostly it was a week of falling asleep with the baby (= no craft/anything time).

Anyway, no more of this self-incriminating blather; time to show off what I made and hastily stuffed into too-small a box (my shipping methods are perhaps a little inhumane ;) ) on their way to a new home.

My Sewn Spaces: Pincushions swap partner was the lovely Kylie (Flickr: Three Honeybees). She had an aesthetic I really appreciate, plus she was really proactive with comments, so easy to "stalk". Partner bliss!  I caught her swooning at someone's creation out of the new "Ruby" fabric line, and sneakily ordered a charm pack to play with. I saw Amy (During Quiet Time)'s tutorial for a cute armrest pincushion earlier and really wanted to try making one, so the two ideas fused together.
Armrest Pincushion
Funnily enough, right before I posted my montage, bluebirdluxe posted her creation from the same tutorial, from the same fabric line!! I think poor Kylie must've been hyperventilating at that point. ;)

I also got my first sewing machine injury while closing up the pincushion part. Reminder to self: Hands pass unwhacked by the sewing machine only when held low to the bed. :P I still have a cracked nail to show for it, but as bad as it looked, it didn't hurt. I also noticed later that one of my thread guides got bent, so apparently I gave back as much as I took.  Take that, machine!

That said, I had about a million ideas other that I didn't get to execute. I did get to embroider a cute bee for an bonus pinnie (not bad for a first time satin stitch, eh?) which actually got finished before the more elaborate pincushion.  I had the hardest time picking the coordinating prints for the front (aha, the orange you can't see is the Daisy print from "Now We're Goin' Places" by Monica Lee) and backing (from Ruby), but I'm happy with how it turned out.

Sewn Spaces Pincushion Swap Loot :)

Anyhow, Kylie also took some fantastically beautiful shots (including the one above!), so check it out in her Flickr photostream, She also has some other super-cute creations of hers, both in fabric and as cookies!

22 September 2011

Swaps sent, and received!

Why is it that when one signs up for another round of swaps, that one ends up doing so with a sense of guilty pleasure? Maybe I'm just feeling guilty for not updating this blog.  I should add a badge for the  Sewn Spaces swap.... I admit it, I wanted a pincushion.  And Round 3 for the Pouch swap started, I've been so pouch obsessed lately, so of course I was in...

...so in conclusion, I better get the previous rounds blogged, right?

I received this embroidery-bliss package from suzettra in the Make Mine Modern Swap.  The hoop is hanging in my sewing room, and the size 5 pearl cotton has already made friends with my size 8 balls. The pouch is actually a lot more than it seems; there's an inside pocket and and outside double pocket on the other side! Perfect for on-the-go stitching. :)  And! 1001 Peeps! Good thing I stashed some of what I sent off, so now I have a pretty decent collection for that extra special project.  The blues are perfect. And cute little stationery cats!

MMM Swap received!

I need to remember to finish sewing earlier so I can get decent shots of things before they are sent off... surely there must be a saying about a late-sewist and her finished items are quickly parted? This was a project plan that took a weird turn...

E was a very verbose partner! ;)  But also very easy-going, but still, you try to make them something that they will really really like, you know?  Anyway, I had started out with a red and purple palette of scraps that I had bought, and nothing about it really gelled for me. Seriously, I felt like I was on a client challenge on Project Runway or something, where the client's tastes felt wildly different from mine, so it took awhile to try to get into her head.  I ended up with the knitting project bag first (it's an enlarged lunchbox bag from Pink Penguin), as something I would like... that I hoped would overlap with her tastes as well.  And then, because I kept thinking it wasn't completely right for her, I made the knitting needle wrap too, in shades of red and black and silver, which isn't my first choice for colors, but is definitely something she loved. I wish I had gotten better pictures of the back, where I did some straight line stitching, spaced in a Fibonacci sequence. (It's surprisingly easy to sew with the seam guide!)

MMM Swap Sent!

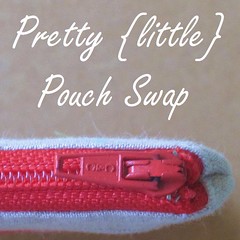
Previously... here's the Pretty {little} Pouch Swap: this is what I got from the lovely Kiza:

P{l}PS Received

I think it's very fitting that her little flower detail in the stitching is what inspired me to put a little flower in my stitching as well! It fits my laptop on-the-go accessories perfectly. She's also right... that print fabric is amazingly silky soft.

And here's what I sent... I really had fun with the hand stitched embellishments. Hopefully I didn't over do it ;) Originally I had fusible fleece on the lining pieces, but piecing+linen+foundation muslin makes for a pretty sturdy outer, so I tore out the fusible. I guess the foundation muslin works as a sewn on interlining.


Pouch Side B

My favorite part is the overlapping diamonds... I had this design mocked up in Illustrator so I could figure out a fitting hand-stitched embeliishment. I was trying out mirrored zig zags to make diamonds, and accidentally made this pattern!  Happy (digital) accidents!

Pouch Side A

I sent along some coasters made from scraps... I was on a serious self-imposed challenge to use the fabric that I had picked out, AND try to use up scraps in a cute but different way. The turquoise was the lining for the pouch.

Coaster A back

Coasters!

I love this shot, so I am including it, just because.

Sneak peek!

20 July 2011

Stash-busting totes

On finishing the baskets, I realized I had way overbought the canvas/denim. I had roughly 1 1/4 yards left that I really didn't want to keep around.  So, tote bags for the wedding party it is!  I remembered seeing a post by D. I. Bride (in searching for inspiring tote "patterns" to copy) on sewing L.L. Bean type totes for her wedding guests, except I wanted to use accents of the basket lining fabric as well.

I picked out a thinnish brown twill from my stash (a remnant find at JoAnn's) that went really well with the blue print, measured a tote I got from an expo and came up with this:

Totes


It's not a very good glamour shot, but it shows off the features. The front center is a patch pocket framed by the straps on either side, the bottom-of-the-bag brown on the bottom, and bound on the top by the lining fabric. The base of the bag had its edges pressed under and topstitched onto the main body (canvas), and over the bottom ends of the straps. I didn't want the base of the bag to wear out, since the dark twill was thinner than the canvas.

For the straps, I cut a piece 2.5" wide by the width of fabric (surprisingly, 44") and folded both sides to the center and pressed. I then cut 1.5" wide strips from the lining fabric, and pressed the sides a scant 1/4" (i.e. as little as I could consistently make it without burning my fingertips). I didn't see the point of "lining" the straps when they were being sewn to the bag front, so I only lined the free part of the straps, roughly 24" (2 12" drops). Then I roughly centered the lining along the length, centered the print in the width, and stitched down both sides to get a nice border of the brown on both sides. The raw edges were sewn down onto the outside of the bag body.

So, I got to this point:

Totes in progress


for three bags. I french seamed one bag (machine went through 6 layers of denim without blinking), boxed the bottom corners, and promptly ran out of time to finish all three before the bachelorette party. My fabulous new neighbor/friend/quilter/crafter extraordinaire was kind enough to serge the edges and finish the two other bags for me while I was out wining and dining the bride-to-be.  Serging is a much less bulky finish! (Which reminds me that I really need to get my serger serviced.)

Totes


I hope the wedding party girls liked them... mostly I'm just glad that 3/4 yd of fabric is out of my stash!! I have a couple more pieces that I'll probably make up into more totes; it's not really good for anything else.

19 July 2011

Bears, butterflies, and baskets, oh my!

The last week of crafting time has been consumed with making some handmade touches to a dear friend's wedding.  Specifically, creating this basket army for her out of town guests:

Basket Army

I thought more structural baskets would be hard to take home, but little fabric totes can be easily squished into suitcases, and when not holding edible goodies, good for containing those nightstand random things you collect while travelling.

It was quite a process, going from this [Flutters (in Water) from Just Wing It! by MoMo]:

Basket linings

and this [JoAnn's 12 oz bull denim in natural]:

Cutting basket canvas

to this:

Corners pre-box cut

And this:

Basket handles

In making the straps, I learned this canvas material was... finicky. It curled whenever it came into contact with moisture, but wouldn't hold a pressing unless it was spritzed. No wonder the straps stretched out of shape! (You can't tell in the picture, but they curl and the lining fabric is creatively mashed flat by four lines of stitching.) I finally got smart at the end and pre-pressed the lining (which behaved beautifully) and the canvas separately, then sewed them together. Also, the blind hem foot is amazing for edge stitching, especially when your machine can change needle positions -- *wonder* *awe*) ... and I clearly deprived myself of standard machine features for far too long with my little 3/4 machine.

To this:

Flattened baskets

The lining is sewn to the outer canvas. I hate baggy shifty linings, and it's a good way to make them stay put, if you don't mind pressing top hems down before stitching them together. And, as I discovered, a good way to box two corners at once without drawing lines or pinning or anything.

And finally, ta da!  Finished baskets.  I made 22 in total.  

Basket army (20% shown)

Mini tutorial/show-and-tell to come, when I can stomach making another basket. :)

28 June 2011

Market Bag!

I am finally getting around to using my FQ/scrap pack of home dec fabrics.  This is a resized version of the Market Bag from Film in the Fridge. I've had the fabrics cut out forever, and finally got to finishing it off. I cut two "front" panels of the orchid print, then two "side" panels of the yellow print, sewed them into a tube and pseudo-flat-felled/topstitched the seam allowances to make it smooth.  The seam allowances on the bottom are 1/2" instead of 1/4" and I'm not sure if that was what made the last two seams of sewing the bottom on different, but I figured out a way that worked for me (and kept the bottom of the bag square). 

FITF Market Bag

I really like the strap length (original length).  It makes it easy to sling the bag on your shoulder.

Fabric used: two prints from Joel Dewberry's Ginseng line, cream muslin for the lining